On the Subject of Micro-Modules

Does this bomb look smaller to you? Wait... Why is it mounted on a bigger bomb?

  • This module consists of a smaller bomb, containing 6 “Micro-Modules”.
  • 4 of these can be solved; the rest are to reset the modules and to disarm the module when all modules are solved.
  • To disarm this module, solve every Micro-Module in the correct order and press submit on the top-middle module.
  • All solve and strike rules can be found in each Micro-Module’s part of the manual.

Table of contents:

  1. On the Subject of the Solve Module + Module Order
  2. On the Subject of Script Wires
  3. On the Subject of Directional Keypads
  4. On the Subject of Code Morse
  5. On the Subject of The Math Code
  6. Appendix TRB: The Reset Button
  7. Appendix EW: Micro-Bomb edgework

On the Subject of the Solve Button + Module Order

A winner is you! That is, if you have the correct order...

  • The module consists of a submit button and 3 screens, displaying the amount of modules unsolved, the current strike count for this module and the solve order.
  • Once all modules are solved, the alarm light will light up.
  • To solve this module, press Submit when all modules are solved in the correct order.
  • Pressing the button while all modules are solved, but in the incorrect order, will hand you a strike.
  • However, for as long as there is at least one unsolved Micro-module, the button is harmless and you can freely click it.

Module solving order.

This will go over the order in which the Micro-modules have to be solved. Refer to the Micro-module ID (The number in the top-right) and the list below.

  • If the module “Code Morse” has an ID of 1 and there is any module which has “Morse” in its name, then the Code Morse module will have to be solved first.
  • Otherwise, if the module “Directional Keypads” has an ID of 2 and there is more than 1 module which has “Button” in its name, then the Directional Keypads module will have to be solved first.
  • Otherwise, if the module “The Math Code” has an ID of 3 and either Micro-Indicators “MINI” or “BOMB” are present, then the Math Code module will have to be solved first.
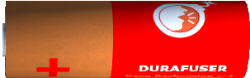
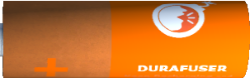
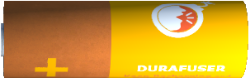
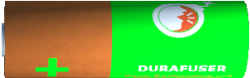
  • Otherwise, if the module “Script Wires” has an ID of 4 and the Micro-Battery’s color is a primary color, then the Script Wires module will have to be solved first.
  • Otherwise, if none of the rules apply and there’s a lit BOMB on the Micro-Bomb OR a lit BOB on the regular bomb, then the order doesn’t matter.
  • Otherwise, if that also doesn’t apply, solve the modules in regular order, starting at 1.

First solve the module you got from above, then solve the next module, by number.

On the Subject of Script Wires

I could maybe script a way around this module...

  • This module consists of a set of 6 different wires.
  • Above the wires is a screen with code.
  • One of the lines is a MeshRenderer[]. Check its name and check the table below.
  • To solve this module, you need to cut wires which color matches that of the entry in the list (See below).
  • If an incorrect wire is cut, you will gain a strike.

The Color Lists.

One of the variables in the script is a List<Color>. It contains data of all wires. If the entry matches the current wire, then cut it. If none of the wire colors match their entry in the list, then cut the 6th wire.

List 1:

If the name of the MeshRenderer is a Micro-Bomb indicator.

List of wire colors in order:

  1. Red
  2. Yellow
  3. Green
  4. Blue
  5. White
  6. Black

List 2:

If the name of the MeshRenderer is a regular bomb indicator.

List of wire colors in order:

  1. Black
  2. White
  3. Blue
  4. Green
  5. Yellow
  6. Red

List 3:

If the name is a port.

List of wire colors in order:

  1. Green
  2. Blue
  3. White
  4. Black
  5. Red
  6. Yellow

List 4:

If it’s none of the others.

List of wire colors in order:

  1. White
  2. Green
  3. Red
  4. Black
  5. Blue
  6. Yellow

On the Subject of Directional Keypads

Arrows! The keypads have ARROWS on them!

  • This module consists of a set of 4 keys on a keypad.
  • All the keys have arrows on them.
  • To solve this module, you need to follow 4 arrows and then press the button you end up on.
  • If an incorrect key is pressed, you will gain a strike.

Step A: Picking the starting offset key.

To find out with what key to begin, take the last digit of the Micro-Bomb’s serial number and refer to the list below.

  • Add the module ID of this module.
  • Then multiply the number by the amount of lit indicators on the regular bomb (if none present, then don’t multiply).
  • If the number is higher than 4, subtract 4.
  • Keep subtracting 4 until your number is 4 or lower.
  • If you have a 1, then the starting offset is the top-left key. 2 is top-right, 3 is bottom-left and 4 is bottom-right.

Step B: Arrow information.

All the info about the arrows is listed below. If an arrow is “fake”, then don’t follow it, but press it. Keep in mind to follow 4 arrows.

Directional arrow: Left Right Reverse
Examples:
Fake if: If the Micro-Bomb’s indicators are all lit. If the Micro-Bomb contains an indicator labelled “INDC”. If both bombs’ serial numbers contain vowels.
Action if not fake: Follow the button on the left. Follow the button on the right. Follow the button above/below this one.
Directional Arrow: Clockwise Swap Diagonal
Examples:
Fake if: The Micro-Bomb’s battery is red. If the Micro-Module’s ID is 4 If the regular bomb contains more than 2  D-Batteries
Action if not fake: Follow the button clockwise from this one Follow the button diagonally from this one.  Follow the button in the direction the arrow is pointing, as if it were in the middle of the keypad.

On the Subject of Code Morse

No. Not Morse Code. It’s a code, deciphered using Morse.

  • This module consists of a display with 4 digits, a Morse light, a keypad with numbers 0–9, a “Send” key and a “Receive Code” key.
  • To solve this module, You need to enter the correct code and send it.
  • To get the initial code or recheck it, press “Receive Code”.
  • Every dot/line is indicated by a yellow light, a new character is indicated by a magenta light and the end of the code is indicated with a red light.
  • This system will only allow inputs when the code isn’t being received. If you press a key while a code is being received, you will get a strike.
  • Additionally, if an incorrect code is sent, you will get a strike as well.
  • Keep in mind, the only way to clear the code is to send it, or by pressing the reset button (See appendix TRB).
  • Take the 4 digits from the Morse code
  • Add the amount of batteries on the regular bomb, multiplied by 10.
  • If the Micro-Bomb’s battery is a primary color, multiply by 30.
  • Divide by the last number of the regular bomb’s serial number. (If it’s 0, multiply by 5.) Do not round the number, but remove the decimals.
  • If the last digit is currently uneven, add 101.
  • Then multiply by the Micro-Module ID
  • Lastly, if the number is higher than 9999, subtract 1000. Keep doing so until it is 9999 or below.
  • Input the code that you now have in the device. If the code has less than 4 digits, do not add zeroes to the code to make it 4 digits

On the Subject of the Math Code

Math! As if you didn’t need math for enough situations yet.

  • This module consists of a screen with 3 characters. The first character is a letter.
  • Above the characters is a Mathematical expression.
  • To solve this module, You need to enter the correct code and press submit.
  • Submitting an incorrect code will result in a strike


First: Take every letter and convert it to a number using A1Z26 ciphering. Then follow the rules.

  • Fill the digit from the first character in A, the second in B and the last digit in C. Do not yet calculate the expression.
  • If the Micro-Bomb’s battery has a primary colored label, then add 5 to A.
  • Multiply B by 3 if any of the starting letters are vowels. Else subtract 3 from B.
  • If either A, B, or C is 0, set those to 1.
  • Add 1 to C for every battery on the regular bomb.
  • Lastly, multiply every number by the amount of lit indicators on the regular bomb (if none, then don’t multiply).
  • Now calculate the expression. Truncate all decimal places after every division operation.
  • If this number is lower than 100, add 100 until it’s 100 or higher. If the number is higher than 999, subtract 100.

Submit the 3 digit number in the screen, using the arrows above and below.

Appendix TRB: The Reset Button

If at first you don’t succeed, press this thing.

  • One of the modules on this bomb is a reset key
  • When pressed, everything on the Micro-Bomb will reset to its original state.
  • After the bomb is reset, the button will be on a timeout.
  • The light at the top right indicates when the button is off-cooldown. When the light is not red, it’s off-cooldown.
  • Additionally, a countdown will be going down to the right of the button.
  • The initial timer is 30 seconds. Every time the button goes off-cooldown, 10 seconds will be added, so be careful when to press it.

Appendix EW: Micro-Bomb edgework

New bomb, new edgework. Even more to remember...

  • This module also contains its own edgework
  • There are 3 indicators, a colored battery and a serial number (Note: For the Serial Number, digits are marked red).
  • Common occurrences for indicators and battery colors are listed below

Part 1: Indicators.

Common Micro-Indicators are as follows.

  • INDC
  • EXPL
  • BOOM
  • MINI
  • BOMB
  • MDLE
  • BLNK
  • XXXX
  • NULL

Part 2: Batteries

Common battery colors are as follows.

Red (Primary) Orange
Yellow Green (Primary)
Blue (Primary) Purple
Pink Black