On the Subject of Pixie Plate

Demons & Pixies 2, soon™ available in your local manual repository.

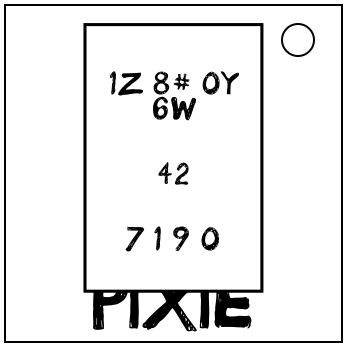
The Plate on the module is an interface to play a modified version of “Demons & Pixies”, a popular tower-defense game. It also contains encrypted information about the game’s starting state.

Rules of Demons & Pixies:

In an 8x4 horizontal grid, some Demons start on right side and move left. If one leaves the grid from the left, you lose.
Thankfully, you get a set of Pixies you can summon to defend you.

The game’s timer works in timesteps. Every action of the same type happens simultaneously in the timestep.
Every timestep, Demons will first all move to the left. Afterwards, Pixies and Demons will simultaneously try to attack each other if they are within range.
One attacker can only attack one attackee at a time.

Every attack subtracts the “Damage” value of the attacker from the “Health” value of the attackee. A creature with zero (or below) Health dies and is removed from the grid at the end of that timestep.

Since every action happens simultaneously, a creature whose Health reaches zero still attacks during this timestep, since its death happens at the end of the timestep only.

This also means a Creature that has zero health can still block attacks until the end of the timestep, when it dies.

No two creatures can be on the same cell. If another creature is directly to the left of a Demon, the Demon cannot move left until that creature dies.

Some creatures have Special Abilities that may trigger at any time or impact the game in various ways.
Special Abilities can override rules of the game. Pay attention to them.

Refer to the next pages to learn how to:

  • interact with the game (p2),
  • determine the starting position of the Demons (p3),
  • determine the Pixies available to you (p3),
  • determine the Voided cells’ locations (p3),
  • a comprehensive list of all Demons (p4) and Pixies (p5) that can appear,
  • and learn about Void with the Shared Appendix V O I D (p7)
Interacting with the game through the Plate:

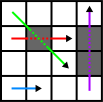
Press near the edges of the Plate to move around the virtual grid, and press the center of the plate to place the next Pixie in this spot.
You start in the top-left corner of the grid. Attempting to move outside of the 8x4 grid will shake the plate to warn you but NOT strike.
If Void brought you outside of the grid, you will return to your pre-movement location, before the Void.

For movements, your current location obviously cannot land on Voided Cells (see Shared Appendix V O I D). Pay attention to them.

When the last Pixie has been placed, a sound and small vibration will play. Press the center of the plate again to submit your placements and verify.

Attempting to place a Pixie where another Pixie or a Demon is already standing will fail and shake the Plate but NOT strike.

If your Pixie placement ended up in a Demon leaving the grid from the left, you’ll get a Strike and the grid will reset. Demons will return to their starting location, all of your Pixies will be removed from the field, and you will go back to the top-left of the grid.

If your Pixie placement ended up with all Demons dying, regardless of the state of your Pixies, you have won and the module will solve.

In case it is needed, press the word “PIXIE” on the module’s casing to reset the placement of all your Pixies and go back to the top-left corner.

Determining the Demons and their starting locations:

Take the inscriptions at the top of the Plate.
Consider each group of 2 characters to refer to a different Demon.
The number is the Demon’s ID in the table on page 5, the other character encrypts its starting position:

Take the second character of the group. Using The Table Below, convert it to a 5-digit binary number.
The first three binary digits, when converted to a number between 0 and 7, is the column index of the Demon. The last two binary digits, when converted to a number between 0 and 3, is its row index.

The Table Below:

A 00000 I 01000 Q 10000 Y 11000
B 00001 J 01001 R 10001 Z 11001
C 00010 K 01010 S 10010 + 11010
D 00011 L 01011 T 10011 / 11011
E 00100 M 01100 U 10100 ? 11100
F 00101 N 01101 V 10101 & 11101
G 00110 O 01110 W 10110 # 11110
H 00111 P 01111 X 10111 % 11111

Determining the Pixies you can place and their order:

Take the inscriptions at the bottom of the Plate.
Each number represents a single Pixie’s ID in the table on page 6. The order they are given in is the order you will place the Pixies in.

Determining Voided cells:

Take the inscriptions in the middle of the Plate, they describe the coordinates of the Voided cells.
It is formatted with two numbers, the first being column index and the second being the row; similar to the Demons’ location once decrypted.

List of all existing Demons:

All Demons can attack exactly 1 cell to their left.

ID Demon Name Health Damage Movement Special Ability
0 Basel 2 1 1 per timestep
1 Y-morGre 3 2 1 per 2 timesteps* Demons directly adjacent (including diagonals) to it inflict 1 more Damage**.
2 Dashaz 2 1 2 per timestep
3 Zagan the Trickster 2 1 1 per timestep The rightmost Pixie in this row cannot attack.
4 Fléauros 4 3 1 per timestep After attacking, cannot move nor attack next timestep.
5 Bifrovst 4 2 1 per timestep A Pixie attacked by this Demon cannot attack this timestep.
6 Vale-Fort 10 1 1 per timestep Demons to its right permanently gain +1 Health**.
7 Sabnlock 2 2 1 per timestep Can only be hit by Pixies in the same row.
8 Vassal-Goh 4 1 1 per timestep At the start of the 3rd timestep, summons a Basel to its immediate right if the cell is empty

*“1 per 2 timesteps” Demons move on one timestep and then are static the next one. They can move on the first timestep.

** Any Creature can only receive one Gain on each stat (+1 in Health and +1 in Damage maximum).

List of all existing Pixies:

Pixie attacks get blocked by Demons but can pass through other Pixies.

ID Pixie Name Health Damage Range Special Ability
0 Nirmiti 1 1 4 right
1 Cryolite 5 0 Can never attack.
2 Tryptophamia the All-Powerful 3 4 2 right Loses 2 Health after each successful attack.
3 Glomie 2 2 3x3 square around it Attacks all Demons in range. Upon death, adjacent Demons (incl. diagonals) cannot move for 1 timstep.
4 Imhullu 1 1 2 right Moves 1 cell to the left after each successful attack.
5 Welkwing 1 1 3 right, including adjacent rows Attacks the leftmost Demon of each row in its range.
6 Vashakapa 1 1 3 right Pixies one cell above or below gain +1 Damage for this timestep.**
7 Mancie 1 3 3x3 square around it Attacks all Demons in range. Cannot attack until the 5th timestep.
8 Ifle-Sym 1 5 3 right Loses 2 Damage after each successful attack.
9 Aribbon 2 1 5 left

** Any Creature can only receive one Gain on each stat (+1 in Health and +1 in Damage maximum).

An empty 8x4 grid to help visualize the playfield:

Tip: press Alt-O to open the Highlighter options. This will help you.

0 1 2 3 4 5 6 7
0
1
2
3

Shared Appendix V O I D:

Voided cells are considered to not exist anymore. Cells aligned on either sides are considered adjacent and at a distance of 1. This includes diagonals.

You can move from one side of a Voided cell to another in a single movement. You cannot stop a movement onto a Voided cell.

Neighbors of a Voided Cell are the cells directly adjacent to it (unless one of them is a Voided cell, in which case the neighbors are of course one cell further).

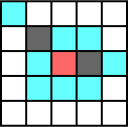
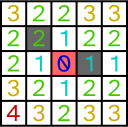
Each arrow represents a single movement of length one Here are the 8 neighbors of a cell with Void around it Distances of a cell with Void in its surroundings