On the Subject of Star Stoned

Don't do drugs kids.

Last night was a movie dude! Darren was jumping off tables, Charlie had a beer funnel running from the attic all the way to the basement, and Kora was trying to convince everyone that she was a foreign intelligence spy from Uzbekistan. Haha, what a great night. Or was that Kyle who was saying the spy stuff? Wait, no no no that's not right. It was DEFINITELY John who had that multistory beer funnel, and Jen was the spy. But maybe I was the one jumping off those tables? That would explain this giant bump on my forehead. Now that I try to remember, I can't recall anything that happened before last night at all! Oh no!! Who am I? What is my name?? And most importantly, WHY IS THIS BEEPING BOX ASKING FOR MY STAR SIGN AND BIRTHSTONE??!

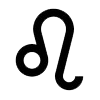
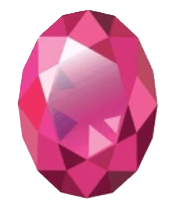
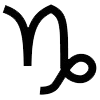
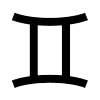
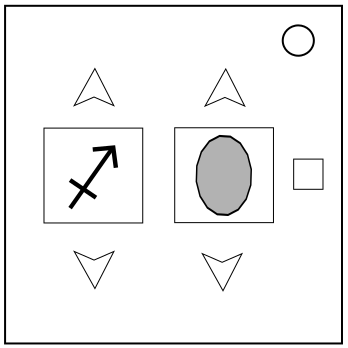
  • This module will display 2 images, the left being a star sign and the right being a birthstone.
  • Use the arrow buttons above and below each image to change the displayed star sign and birthstone.
  • The initial star sign and birthstone displayed on the module will have a purple border.
  • Once the correct star sign and birthstone are displayed together, press the green submit button to solve the module.
  • Upon submitting an incorrect combination of star sign and birthstone, the module will strike.

Set Up

  1. Take the last digit of the serial number modulo 3, and then add 1. This number corresponds to the correct Star Stone table to use below.
  2. Next, we will gather a primary sequence and a secondary sequence of movements to help navigate the table:
    • If the serial number contains a repeated character, the primary sequence is A.
    • Otherwise, if if the bomb has 2 or more indicators, the primary sequence is B.
    • Otherwise, the primary sequence is C.

    • If the bomb has more ports than batteries, the secondary sequence is X.
    • Otherwise, if the initial birth stone name contains the letter E, the secondary sequence is Y.
    • Otherwise, the secondary sequence is Z.

  1. Finally, we need to determine which 3 cells in the table are SWITCH cells.
    1. Split the serial number into 3 pairs with the 1st and 2nd characters paired, the 3rd and 4th characters paired, and the 5th and 6th characters paired.
    2. Convert all letters to numbers using A1-Z26.
    3. For each pair, add/subtract 4 from the first number until the number is between 1 and 4, and add/subtract 3 from the second number until it is between 1 and 3. Then convert the first number in each pair back to a letter using A1-D4.
    4. Each letter-number pair now corresponds to the location of a SWITCH cell in the table.
    5. If there is a repeated SWITCH cell, move one cell right, wrapping around if necessary, until you reach a non-SWITCH cell. This is a new SWITCH cell. Repeat until there are 3 unique cells.

Finding the correct combination

  1. Using the correct table, begin at the cell containing the initial star sign.
  2. Reading left to right from the primary sequence, move through the table one cell at a time in the stated direction, wrapping around if necessary.
  3. However, if a movement results in you landing on a SWITCH cell, you must switch to using the direction in the next position in the other sequence before making your next movement. For example, if the 3rd movement in the primary sequence results in a SWITCH cell being reached, movements 4 and onward will follow the secondary sequence until a SWITCH cell is reached again.
  4. If your starting cell is a SWITCH cell, move one cell to the right at a time, wrapping around if necessary, until you land on a non-SWITCH cell. This is your new starting cell.
  5. After 12 movements (not including starting cell modifications) have been completed, the cell you finish on will contain the correct star sign.
  6. Repeat the above steps to obtain the correct birthstone, but begin at the cell containing the initial birthstone, and start with the secondary sequence instead.

Sequences

A ↓ → ↓ ← ↓ → → ↓ → ← ← →B↓ ↓ ↑ ↓ ↑ ← ↑ → ↓ ↓ → ↑C↑ ↑ ↑ ← ← ↓ ↑ ← ↑ ← → →
X↑ ← ↓ ↓ → ↓ → → ↓ ← ← ←Y↓ ↑ → ← ↑ ← ↑ ← ← ↓ ↓ ↓Z↑ ← ↑ ↑ ← → ↓ ← ↑ ↑ → ←

Star Stone Tables

Table 1ABCD
1
2
3

Table 2ABCD
1
2
3

Table 3ABCD
1
2
3

Appendix

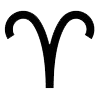
AriesTaurusGeminiCancerLeoVirgo
LibraScorpioSagittariusCapricornAquariusPisces
GarnetAmethystAquamarineDiamondEmeraldPearl
RubyPeridotSapphireOpalTopazTurquoise