On the Subject of Treasure Hunt
“Fetch aft the rum, Darby!”
- The module consists of a screen displaying a portion of a map and four arrow buttons.
- To disarm the module, use the arrow buttons to navigate the map and press the screen when it is showing the Treasure Island.
- Trying to navigate outside the map or pressing the screen when it is not showing the Treasure Island will cause a strike.
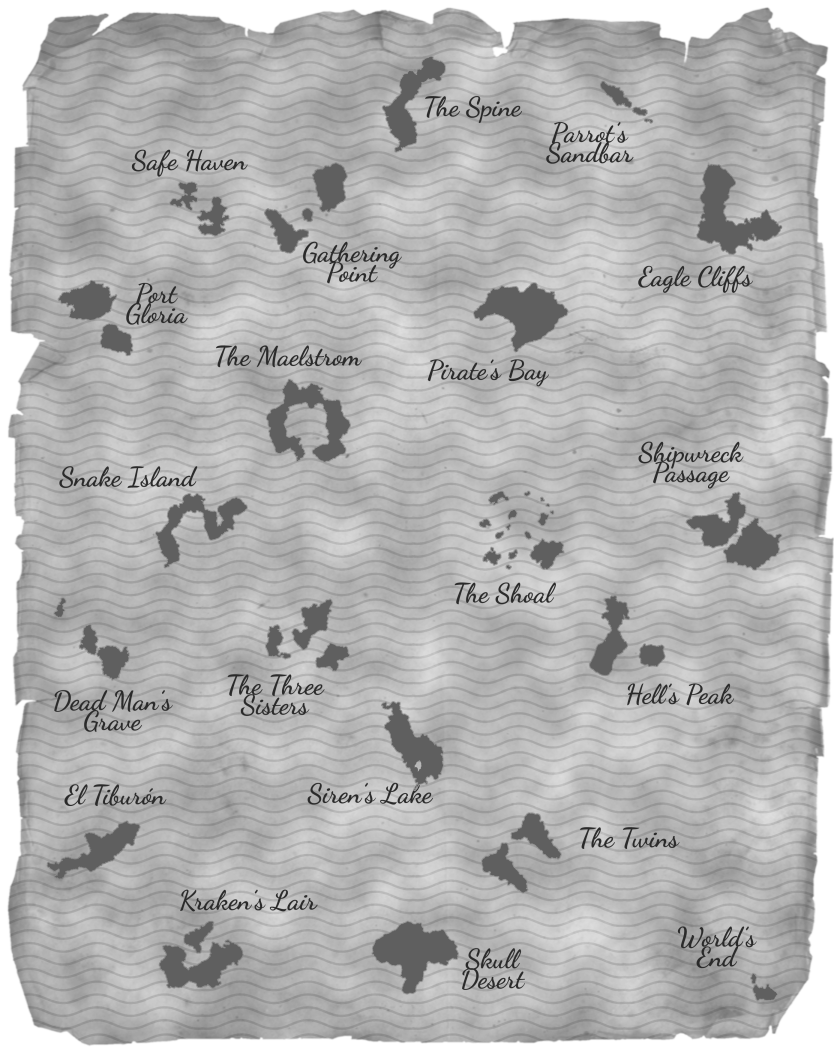
- There is a copy of the map in the next page. The map may be rotated.
Determining the Treasure Island
Pay attention to the following list of Key Modules:
- Coordinates
- Maritime Flags
- Semaphore
- Battleship
- The Jewel Vault
- Splitting The Loot
- Combination Lock
- Safety Safe
- Constellations
Count the number of Key Modules on the bomb and the number of Key Modules that have been solved. Use the table below to determine the Treasure Island.
| Number of Key Modules Solved | ||||||
|---|---|---|---|---|---|---|
| 0 | 1 | 2 | 3 | 4+ | ||
| Number of Key Modules Present | 0 | Pirate’s Bay | ||||
| 1 | Kraken’s Lair | The Three Sisters | ||||
| 2 | El Tiburón | World’s End | Shipwreck Passage | |||
| 3 | Hell’s Peak | The Maelstrom | Parrot’s Sandbar | Gathering Point | ||
| 4 | The Twins | Snake Island | The Shoal | Eagle Cliffs | Skull Desert | |
| 5+ | Port Gloria | The Spine | Dead Man’s Grave | Safe Haven | Siren’s Lake | |